The Problem to Solve
When I first read about the Threadsafe Lazy Singleton pattern, I was impressed by its elegance and wished there was something equally elegant for threadsafe lazy-loading of instance fields without the Java synchronized keyword. In most cases, declaring my fields as final and initializing them in the Constructor, even if they are never used in a given run of an application, has been satisfactory because Object allocation is generally cheap. Recently, however, I have encountered a situation where eagerly-loading a field is prohibitively expensive. The field must also be accessed in a threadsafe way. Because the accessor method will be called frequently after the first time it is called, I would prefer not to wrap the accessor implementation with a synchronized block (even though the performance hit can be small). This situtation has provided the right opportunity for me to investigate how the Java 5 concurrency utilities might help.Start with a Test
Personally, I find it good practice to start the implementation of any new feature with a test. Here we want to verify that, if multiple threads call an accessor that lazily creates an Object, then the same Object instance is always returned from the accessor.Since we are writing a test of thread-safety, it makes sense that the test case should use multiple threads. All threads should start at the same time and the results from each thread's execution should be evaluated only after all the threads have finished. This appears to be an opportunity to use a CountDownLatch, or rather two CountDownLatches: the first signals all threads to start; the second signals when all threads have finished.
So the structure of our test case can be mapped out as follows:
- Setup some threads that will call the lazy-accessor method.
- Run the threads to completion.
- Collect the results from the lazy-accessor calls in each thread.
- Verify that the same Object has been returned for every call.
The code below provides a starting point for what we need.
public class TestLazyCreation {
  private static final int NUMBER_OF_THREADS = 10;
  private CountDownLatch startSignal;
  private CountDownLatch doneSignal;

  @Before
  public void setUp() {
    startSignal = new CountDownLatch(1);
    doneSignal = new CountDownLatch(NUMBER_OF_THREADS);
  }

  @Test
  public void threadsafeLazyCreationReturnsExactlyOneInstance()
      throws Exception {
    final List<Future<Object>> futures =
    submitCallables(/*A class instance with an accessor*/);
    allowTheThreadsToRunToCompletion();
    assertThatExactlyOneNonNullObjectWasReturned(futures);
  }

  private List<Future<Object>> submitCallables(/*A class with an accessor*/) {
    final ExecutorService executorService = Executors
      .newFixedThreadPool(NUMBER_OF_THREADS);
    final List<Future<Object>> futures = new ArrayList<Future<Object>>();
    for (int i = 0; i < NUMBER_OF_THREADS; i++) {
      futures.add(
      executorService.submit(/*The accessor class wrapped with a Callable*/));
    }
    return futures;
  }

  private void allowTheThreadsToRunToCompletion() throws InterruptedException {
    Thread.sleep(250);
    startSignal.countDown();
    doneSignal.await();
  }

  private static void assertThatExactlyOneNonNullObjectWasReturned(
      final List<Future<Object>> futures) throws InterruptedException,
      ExecutionException {
    final Set<Object> lazilyCreatedObjects = new HashSet<Object>();
    for (final Future<Object> future : futures) {
      lazilyCreatedObjects.add(future.get());
    }
    assertEquals(1, lazilyCreatedObjects.size());
    assertNotNull(lazilyCreatedObjects.iterator().next());
  }
}
Typical Lazy Instantiation
We still need to fill in the code above in two spots:- We need a class with an accessor.
- We need a Callable that wraps that accessor class.
abstract class LazyGetter {
  protected Object performLongRunningInitialization() {
    try {
    Thread.sleep(1);
    } catch (final InterruptedException e) {
    }
    return new Object();
  }
  abstract Object get();
}

class TypicalLazyGetter extends LazyGetter {
  private Object lazilyCreatedObject;
  @Override
  Object get() {
    if (lazilyCreatedObject == null) {
      lazilyCreatedObject = performLongRunningInitialization();
    }
    return lazilyCreatedObject;
  }
}
This inner class inside TestLazyCreation will work as a Callable wrapper that uses the startSignal and doneSignal setup by the test class:
private final class CallableLazyGetter implements Callable<Object> {
  private final LazyGetter lazyGetter;

  CallableLazyGetter(final LazyGetter lazyGetter) {
    this.lazyGetter = lazyGetter;
  }

  public Object call() throws Exception {
    try {
      startSignal.await();
      return lazyGetter.get();
    } finally {
      doneSignal.countDown();
    }
  }
}
Now we can change the TestLazyCreation class to use the lazy accesor and the Callable wrapper just defined:
public class TestLazyCreation {
....
  @Test
  public void threadsafeLazyCreationReturnsExactlyOneInstance()
      throws Exception {
    final List<Future<Object>> futures = submitCallables(new TypicalLazyGetter());
    ....
  }

  private List<Future<Object>> submitCallables(final LazyGetter lazyGetter) {
    ....
    futures.add(executorService.submit(new CallableLazyGetter(lazyGetter)));
    ....
  }
  ....
  private final class CallableLazyGetter implements Callable<Object> {
    ....
  }
}
Looking at the code above, what do you think will happen when we run this test case?
Try running it a few times. What do you see?
My typical JUnit results show a failure similar to this:
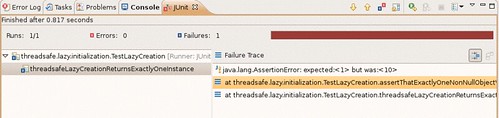
The TypicalLazyGetter could be called NotThreadsafeLazyGetter. So how can we make this type of lazy instantiation threadsafe?
Java provides three keywords that are often associated with a class' synchronization policy: synchronized, final and volatile.
We can declare lazilyCreatedObject final and instantiate it in the constructor for TypicalLazyGetter, but then the Object would not be created lazily, so that solution is not what we want.
We can change the accessor declaration to synchronized Object get(), but we are trying to avoid the synchronized keyword.
We can change the declaration of lazilyCreatedObject to private volatile Object lazilyCreatedObject, but this does not solve our problem because the test-then-set critical section of the accessor method is not atomic. Run the test case again using the volatile declaration if you do not believe me.
Threadsafe Lazy Instantiation
The solution is fairly simple and boilerplate, if not as compact as the typical non-threadsafe lazy instantiation method. The key is to use an AtomicReference, and in particular, the method compareAndSet(V expect, V update). The code below will satisfy what we need:
class ThreadsafeLazyGetter extends LazyGetter {
  private final AtomicReference<Object> lazilyCreatedObject =
    new AtomicReference<Object>();

  @Override
  Object get() {
    final Object existingValue = lazilyCreatedObject.get();
    if (existingValue != null) {
      return existingValue;
    }
    final Object newValue = performLongRunningInitialization();
    if (lazilyCreatedObject.compareAndSet(null, newValue)) {
      return newValue;
    }
    return lazilyCreatedObject.get();
  }
}
What is the worst that could happen?
Multiple threads might enter the accessor, see that the lazilyCreatedObject referent has not been set and call performLongRunningInitialization(). As long as performLongRunningInitialization() can be called multiple times (i.e., it does not have side-effects or requirements that it be called at most once), then we should be safe. The accessor will return the same instance of the lazilyCreatedObject each time it is called.
Now we can modify our test class as follows:
@Test
public void threadsafeLazyCreationReturnsExactlyOneInstance()
    throws Exception {
  final List<Future<Object>> futures = submitCallables(new ThreadsafeLazyGetter());
  allowTheThreadsToRunToCompletion();
  assertThatExactlyOneNonNullObjectWasReturned(futures);
}

@Test(expected = AssertionError.class)
public void nonThreadsafeLazyCreationCanReturnMultipleInstances()
    throws Exception {
  final List<Future<Object>> futures = submitCallables(new NotThreadsafeLazyGetter());
  allowTheThreadsToRunToCompletion();
  assertThatExactlyOneNonNullObjectWasReturned(futures);
}
The second test case is silly but emphasizes that we expect the typical NotThreadsafeLazyGetter to fail in a mutli-threaded environment.
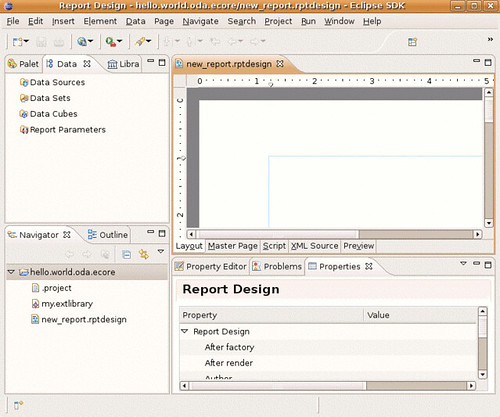
Lazy Instantiation in Eclipse
As previously mentioned, Object allocation is cheap with the latest releases of Java, so lazy-instantiation is often not necessary. Because I have spent the last 1 1/2 years programming Eclipse plug-ins, an example from Eclipse might provide a demonstration of a good use of lazy-instantiation.First, we can define a class that lazily instantiates an Object from an Eclipse plug-in that does not typically get started when Eclipse is started. For this example, I chose to use something from org.eclipse.xsd:
class ClassThatLazilyCreatesAnObjectInAnotherPlugin {
  private final AtomicReference<XSDSimpleTypeDefinition> lazilyCreatedObject =
    new AtomicReference<XSDSimpleTypeDefinition>();

  XSDSimpleTypeDefinition get() {
    final XSDSimpleTypeDefinition existingValue = lazilyCreatedObject.get();
    if (existingValue != null) {
      return existingValue;
    }
    final XSDSimpleTypeDefinition newValue = XSDFactory.eINSTANCE
      .createXSDSimpleTypeDefinition();
    if (lazilyCreatedObject.compareAndSet(null, newValue)) {
      return newValue;
    }
    return lazilyCreatedObject.get();
  }
}
Next, we create a "Hello World" Command Contribution using the standard Eclipse Extension Wizard. We can insert the following code into the generated Hello World AbstractHandler:
private boolean firstTimeIn = true;

public Object execute(final ExecutionEvent event) throws ExecutionException {
  final IWorkbenchWindow window = HandlerUtil
    .getActiveWorkbenchWindowChecked(event);
  if (firstTimeIn) {
    new ClassThatLazilyCreatesAnObjectInAnotherPlugin();
    MessageDialog.openInformation(window.getShell(),
      "Threadsafe Lazy Initialization Plug-in",
      "The Sample Object has been created.");
    firstTimeIn = false;
  } else {
    new ClassThatLazilyCreatesAnObjectInAnotherPlugin().get();
    MessageDialog.openInformation(window.getShell(),
      "Threadsafe Lazy Initialization Plug-in",
      "The Internal Object from another plug-in has been created.");
  }
  return null;
}
The implementation is a toy example, so do not read much into it. The first time the command is executed, the ClassThatLazilyCreatesAnObjectInAnotherPlugin is instantiated. During each subsequent command execution, the ClassThatLazilyCreatesAnObjectInAnotherPlugin is instantiated and its accessor is called.
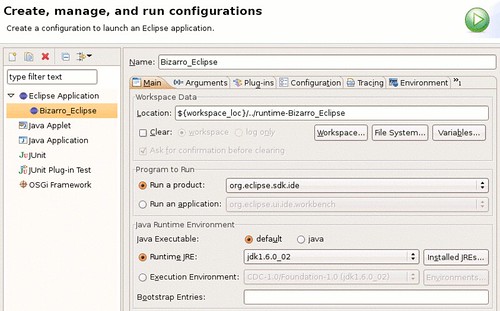
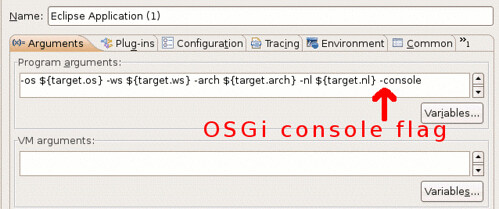
Now on the Manifest.MF Overview, we can run an Eclipse application that uses our Command contribution. In the launch configuration, on the Arguments tab, make sure to pass the Program argument -console to start the OSGi console so we can view plug-in state when we execute our command.
After the Eclipse workbench comes up, we will see a new Coolbar button for our Command contribution. We will also see in your console view the osgi> prompt (For a good introduction to using the osgi console for more than viewing plug-in state, see Explore Eclipse's OSGi console).
In the console, type ss to see the state of all the plug-ins in the running Eclipse application, and look for the org.eclipse.xsd plug-in. You will see something like this:
836 <<LAZY>> org.eclipse.xsd_2.4.0.v200801152000
Now press our Command contribution button once so the dialog pops up. Again, type ss in the osgi console. The org.eclipse.xsd plug-in state has not changed:
836 <<LAZY>> org.eclipse.xsd_2.4.0.v200801152000
Press our command contribution button once more so the dialog pops up again. Type ss in the osgi console and what do you see? The org.eclipse.xsd plug-in has been activated! If you are as fortunate as I am to be running on low-powered hardware, you might even notice the slight lag before the dialog pops up as the plug-in is being activated:
836 ACTIVE org.eclipse.xsd_2.4.0.v200801152000
There you have it: in Eclipse, it does make sense in some cases to use lazy-instantiation. In this case, if the XSDSimpleTypeDefinition were created in the class' constructor, then the xsd plug-in would be activated even if the Command were never executed more than once in a given run of the Eclipse application. It is a contrived example, but the situation does apply not infrequently. For plug-ins that are expensive to start, the usefulness is obvious.